Damp in a caravan can be a major issue, but don’t panic. With a methodical approach, you can restore your caravan to a dry, comfortable condition.
Here’s a step-by-step guide to identifying, exposing, and fixing damp in a caravan, including the cost of the Damp Caravan Repair.
How to check for damp in a caravan

Before diving into repairs, first check if there’s a damp problem.
How to check for damp in a caravan
- Smell Test: A damp smell is a common sign. A caravan without damp should smell as fresh inside as it does outside.
- Visual Signs: Look for dark patches, bubbling or pimples on the wallboards, stains, or marks on the walls or ceiling.
- Soft Walls: Press gently on the walls. If they feel soft under pressure, that’s a sign of damp in your caravan wall.
- Damp Meter Check: A damp meter can confirm areas of concern and give a more precise reading of the damp in the caravan wall.
- Annual Service Report: If a recent service report has highlighted damp, act on it promptly before it spreads.
Caravan damp readings
Readings from a damp meter will indicate if there is a damp problem
Damp Reading Guide
- 0 – 15% – dry surface, with no damp.
- 15 – 20% – Could be the start of a damp problem. keep an eye on it.
- 20 – 30% – Very likely have water ingress.
- Above 30% – Serious damp problem.
How to fix Damp in a Caravan
Step 1: Expose the Problem

Once the damp is detected, prepare yourself for a messy process. To fully address the issue, you need to expose the affected area:
- Remove all furniture from the area, leaving a clear workspace.
- Remove the inner wall panelling. This is usually a thin material that can be carefully pried away.
- Inspect the framework and insulation underneath to assess the extent of the damp or rot.
- Continue removing the wall panelling until you’ve uncovered the full area of damage. Don’t stop until you’ve exposed everything—damp often extends further than expected.
Top Tip
Slide a handsaw behind the wallboard and between the insulation to help remove the wallboard.
Step 2: Locate the Leak
With the damp wall panelling removed, it’s time to find the source of the water ingress. Rainy weather is the ideal time to do this, as water tracks can be easier to see. Alternatively, you can simulate rain by pouring water on the caravan’s exterior and watching where it enters.
Common leak areas include:
- Seams under the aluminium trim strips between the walls, roof, or front.
- Window surrounds and front boxes.
- Awning Rails
Step 3: Seal the Leak
Once you’ve identified the source, it’s time to seal it. Here’s how:
- PU Adhesive: Use a polyurethane (PU) adhesive like “SikaFlex 522” for a strong, waterproof seal.
- Grease Rubber Seals: Dried rubber seals may need re-greasing to make them watertight again
- Replace Rubber Seals: If you’re dealing with aluminium trim strips, the rubber inserts and screws might need replacing. Remove the old sealant, clean the area, and apply fresh PU adhesive.
- Screws: Opt for stainless steel screws for longevity. When installing them, apply PU adhesive to the screw threads for extra sealing.

Sikaflex 522

Silicone Grease
If the leak is coming from a window surround or front box
- Remove any old trim or plastic edging.
- Replace rotten wood frames underneath as needed
- Seal the area with PU adhesive.
For cracks in composite or plastic bodies
- Fill cracks with PU adhesive if flexibility is required. If the area doesn’t flex, consider using “JB Weld” for added rigidity.
- Reinforce from behind with additional adhesive if possible.
Step 4: Rebuild the Framing


Once the leak is sealed, you can start rebuilding the affected area:
- Remove any rotten timber
- Treat any remaining wood with a wet rot hardener
- Replace rotten timber battens, matching the size of the original wood
- Apply Ct-1 adhesives to attach the wood to the external caravan wall
- Apply PVA glue and screws to join the new wood securely to the original strips of wood. Stainless steel screws are recommended.
- Reinsert insulation, using either new materials or salvaging old insulation if it’s dry and intact.
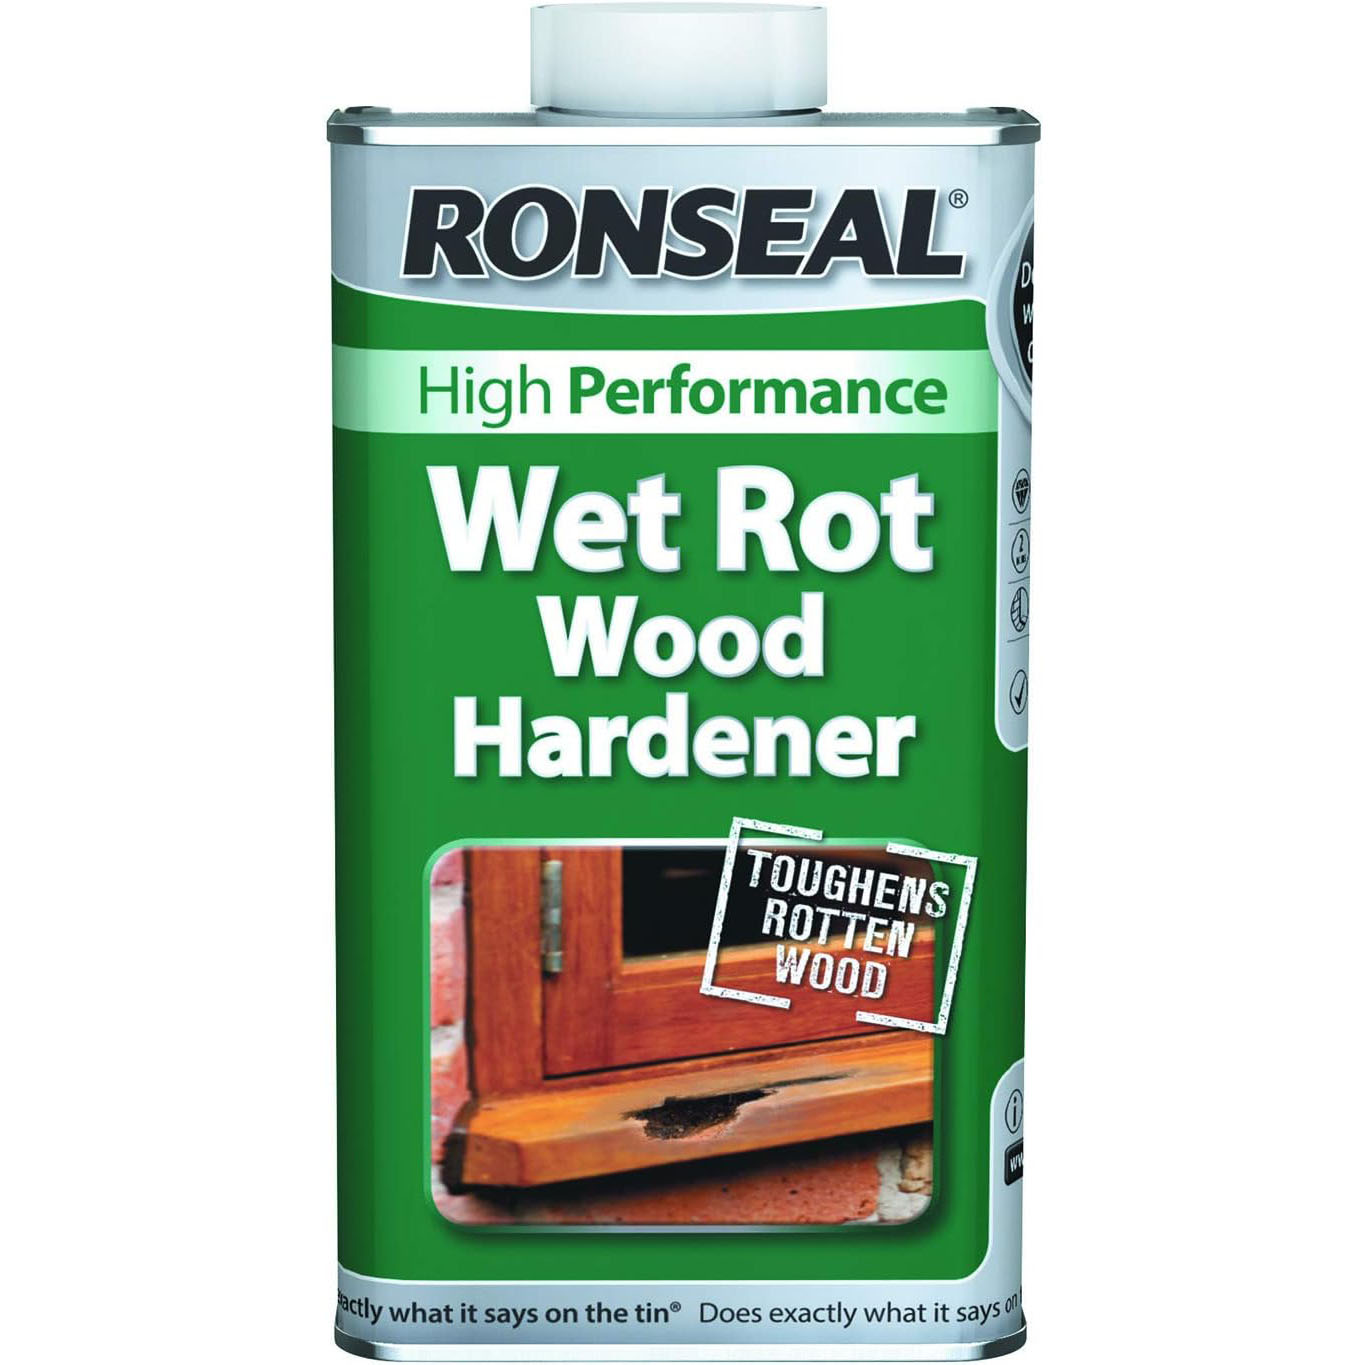
Ronseal Wet Rot Hardener
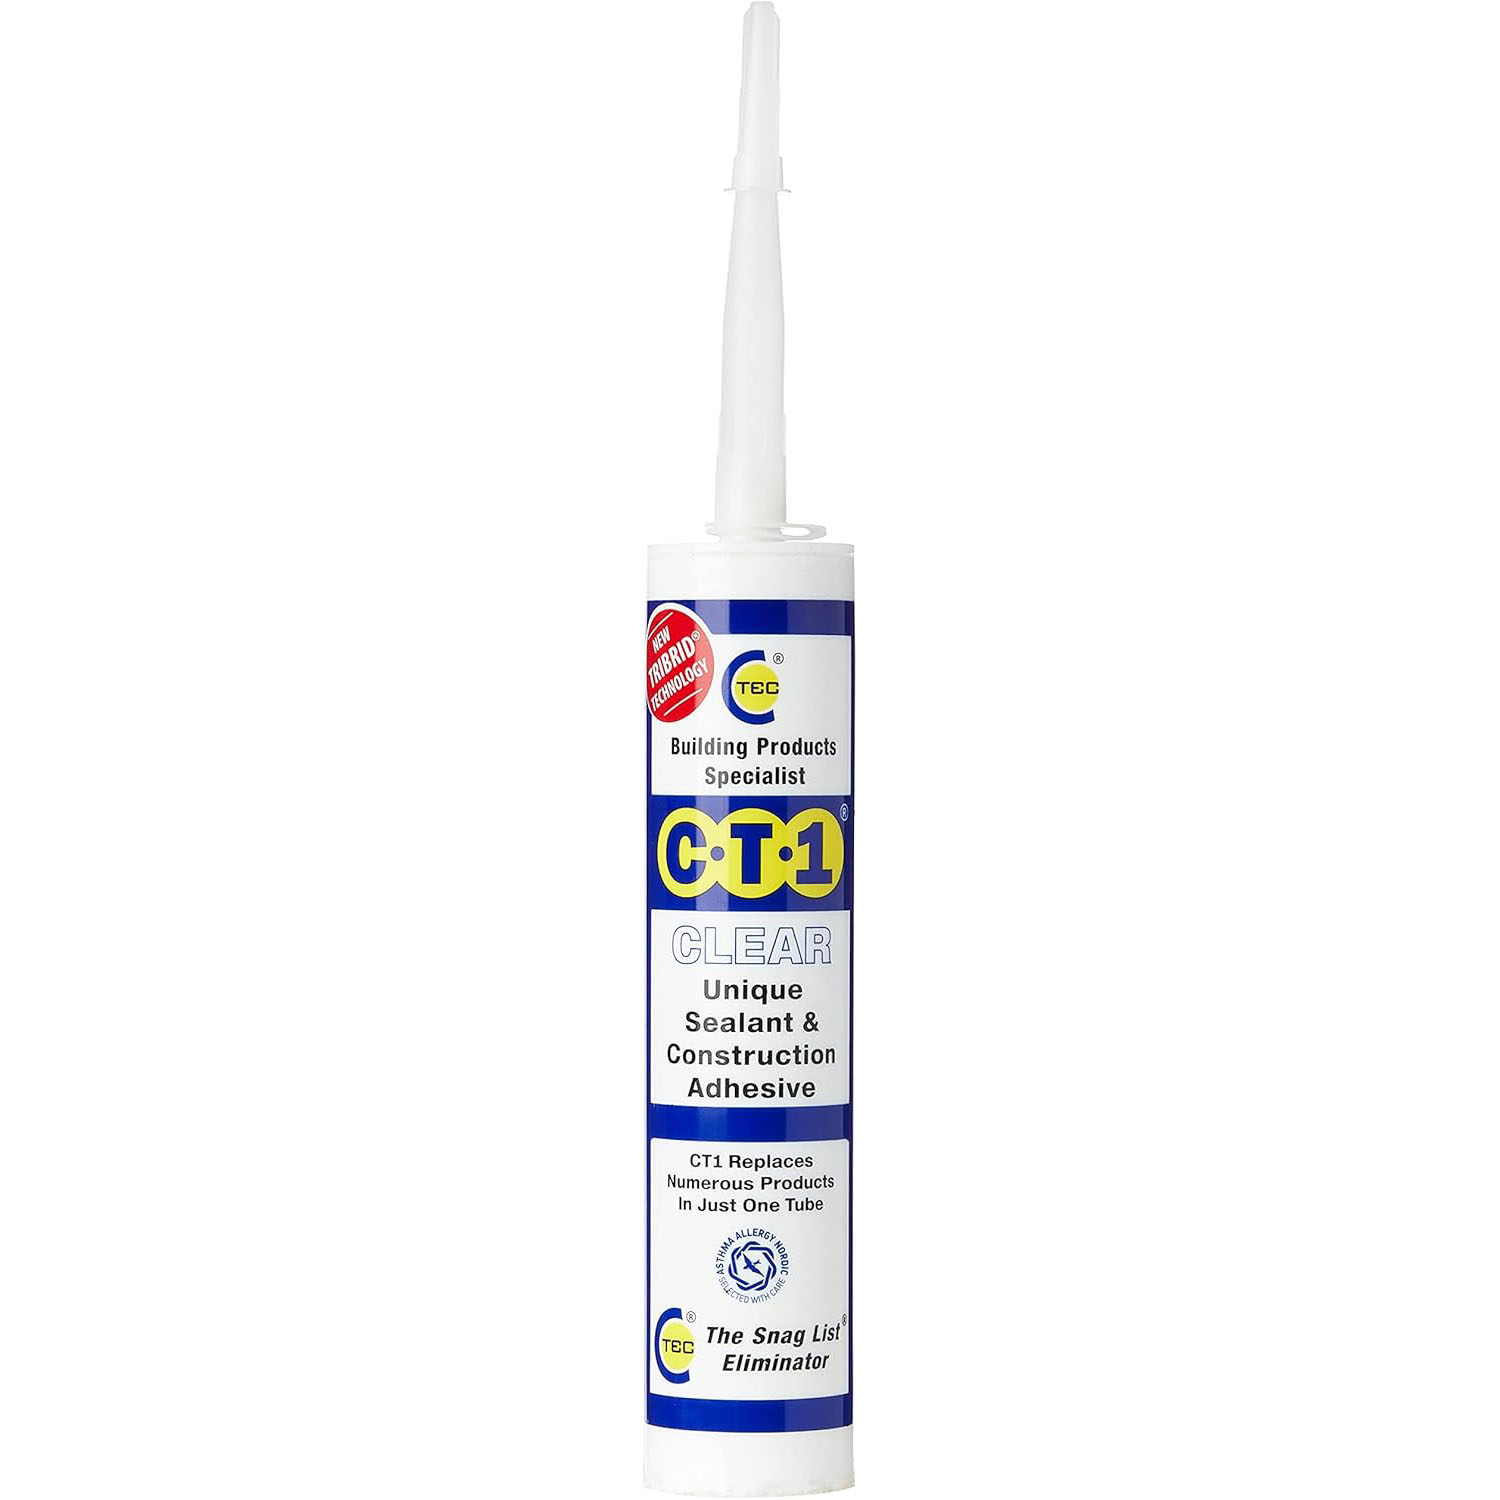
CT1 Sealant & Adhesive
Step 5: Fit the Wallboards
After repairing the internal structure, refit the inner wall boards and assess any additional finishing needs:


- Mix the 2-part polyurethane adhesive thoroughly,
- Apply the 2-part polyurethane adhesive using a notched trowel. Take your time to ensure the whole surface is covered. The adhesive has a long working time, so don’t panic that it is going off.
- Attach the new wall boards. Ensure full contact with the wood and polystyrene across the entire surface of the board.
- cover any board joins, using Caravan wallboard jointing tape to match the wallboard style.
Top Tip
Apply the adhesive to the wall, not the wallboard.

M400 Caravan Wallboard Adhesive
Step 6: Re-fit the furniture
It is now finally time to re-fit the furniture. Carefully assemble the furniture in the opposite order from which it was removed.

Final Tips for Dealing with damp in a caravan
- Stay Confident: Damp repairs may seem overwhelming, but patience and attention to detail will help you succeed.
- Follow the Process: Thoroughly expose the damage, fully seal all leaks, and rebuild carefully.
- Check Regularly: Regular checks and maintenance can prevent damp issues from arising in the future.
Caravan Damp Repair Cost
Here is a breakdown of the damp repair cost in the Bailey Senator 6 Caravan, shown above
Caravan Damp Repair Cost
- Sikaflex 522 – £11
- Wet rot hardener – £15
- Replacement timber – £15
- CT1 adhesive – £14
- 2 x Bailey Ashton Wallboards – £92
- 1 x Bailey Ashton Joint Tape – £15
- Wallboard adhesive 6.5kg – £55
Caravan Damp Repair Cost = £217
In Summary
While damp in a caravan can feel like a significant problem, it’s manageable with the right approach. If you’re reasonably handy and comfortable with DIY, you can confidently tackle damp issues and restore your caravan. Address damp step by step, remain vigilant with regular checks, and your caravan will stay dry and comfortable for years to come.
How can I tell if my caravan has a damp problem?
A musty or stale smell when entering the caravan.
Visible dark marks or staining on walls and ceilings.
Soft walls or areas that feel like they “give” when pressed.
Elevated readings on a damp meter, give precise information on moisture levels.
How can I find the exact source of the damp in a caravan?
With the inner wall panelling removed, monitor for water tracks, especially during rainy weather. If you need to speed up the process, pour water over the suspected area on the caravan exterior to see where it enters inside. Common places to check are seams, window surrounds, and roof joints.
Do I need to replace all the wood if it’s damp?
Not necessarily. If the wood framework is only slightly affected and is still structurally sound, you can clean, dry, and seal it. However, if the wood is heavily rotted or crumbling, it’s best to replace it to ensure a solid, lasting repair.
How can I prevent future damp in a caravan?
Regularly inspect and reseal areas prone to leaks, such as seams and window surrounds.
Use a damp meter for periodic checks.
Clean and store the caravan in a well-ventilated area or use a dehumidifier if possible.
Maintain your seals, rubbers, and trims, especially before and after wet seasons.
How long does damp in a caravan take to repair?
It depends on the extent of the damage. Small leaks can be fixed in a few hours, but severe cases with rot and extensive repairs may take several days. This includes drying time for adhesives, sealants, and any replacement materials.
Can I use regular glue instead of PU adhesive?
No, regular glue won’t provide the waterproofing and strength needed. PU adhesive is recommended for damp repairs because of its durability and waterproof properties.
Is it better to do damp repairs myself or hire a professional?
It depends on your comfort level with DIY tasks. If you’re confident and have basic tools and skills, you can follow the steps above to tackle most damp repairs. For extensive damp problems, or if you’re unsure about certain repairs, it might be wise to consult a professional.
What maintenance can help avoid future damp in a caravan?
Routine inspections, especially of seals and rubbers, are crucial. Check your caravan after heavy rain or during seasonal changes, ensuring any small leaks are sealed promptly to prevent damp from spreading. Regular ventilation and using a damp meter are also helpful for ongoing damp prevention.
How much does it cost to repair damp in a Caravan?
Professional Caravan damp repair cost – expect to pay between £1000 > £3000 depending on the severity of the damage
DIY Caravan Damp repair – Fixing the Caravan yourself will cost around £200 > £500 depending on the size of the area, and any extras, like window rubbers or replacement awning rails etc.
What does damp in a caravan look like?
Look for dark patches, bubbling or pimpling wallboards, stains, or marks on the walls or ceiling.